Gears...
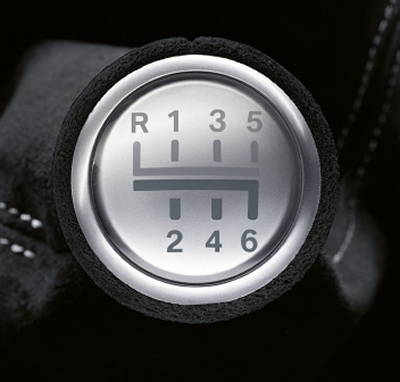 Some drivers always change through the gears one-by-one (1,2,3,4,5 - 5,4,3,2,1).
This is a habit that has stuck with some older drivers from when they originally learned to drive and was commonly taught well into the late 1990s. But it's not generally good practice to use the gears in this way when driving modern cars.
Over the years, motor car design and engineering has improved. Compared with cars of even thirty years ago, modern vehicles are lighter, more powerful and more aerodynamic.
These changes (and others) mean that the driving method that was essential in older cars is not necessary for modern driving.
Because cars used to be heavy and braking systems were not as efficient as they now are, it was necessary to use the gears (or to be more precise, the engine compression) to help to slow the car down.
The combination of efficient braking systems and lighter vehicles now means that drivers can slow down without the need to change to a lower gear.
Gears to go!
Gear changes are only required when power is needed to keep the car moving. Specific gears can be used in different situations to vary the effect of the gas pedal on balance an handling.
This means that if you are stopping, you don't need to change gear until after you have stopped. This is the preferred method of the UK Driving Standards Agency and all advanced driving organisations.
Missing out gears
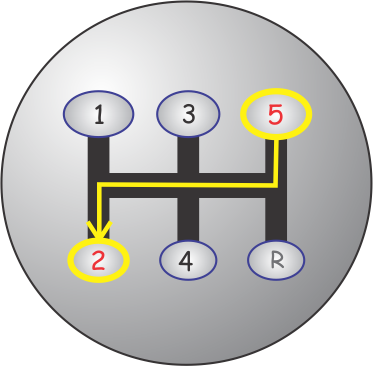 It is not necessary to change gears in sequence.
For example: If you are driving along a main road at 60mph in 5th or 6th gear, and you intend to turn left into a side road, you will usually be able to do so without having to stop; more often than not you will be using 2nd gear to do this.
The old way required every gear, 6, 5, 4, 3, 2, but this is no longer the case.
As you approach the junction, reduce your speed by releasing the gas pedal and braking until you are going slowly enough to negotiate the junction safely - then change gear.
It is only after you have slowed down to a safe speed for the turn by using the brakes, that you need to select the gear that will drive the car comfortably at the lower speed. In most cars the best gear for the job will be 2nd.
Move the gear lever into neutral position and then directly to second gear.
You can occasionally skip gears when changing up but this is less common. A typical upward skip might be from 3rd to 5th on an open road.
Skilled drivers tend not to 'overlap' brakes and gears. This means that they finish braking and release the brake pedal before pressing the clutch and making the gear change - this leaves the right foot free for the gas pedal when the clutch is engaged.
Observation when changing gear
 The fact that you are considering a gear change means that there must be:
- A change in the road or traffic situation ahead
- That you are planning to change speed
- That you need more power to accelerate of climb a hill
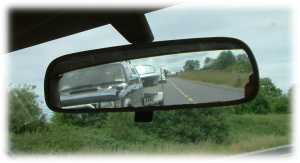
Before you take action to deal with the changing situation ahead (or change speed) you must check the situation behind. In other words, every gear change must be preceded with a mirror check. This check may simply be to confirm that things have not changed since your last mirror check (which may have been only seconds before).
Remembering that you are changing gears to go. That is, using the engine power to maintain (initially) or increase speed it's essential to know whether other drivers are trying to overtake you otherwise you could find yourself in trouble!
 Looking ahead
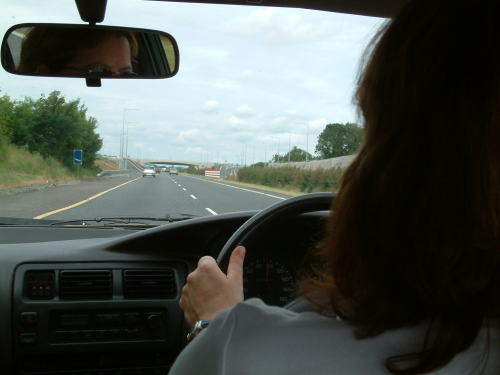
Although it may seem obvious that you should not look at the gear lever, many drivers glance down subconsciously.
Make sure that you always look well ahead when making gear changes. This becomes especially important if your gear change techniques are changing as your driving improves.
- Initially, your new method of gear changing will not be an 'unconscious action' and so might become a distraction in itself...
- Looking down could turn a minor distraction into a major problem!
Two gear change practice projects
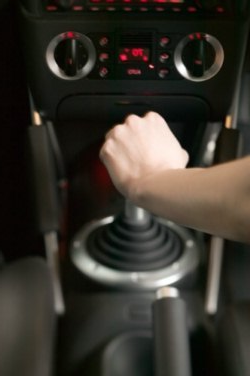 If you are thinking of taking an advanced driving test or are training to become a driving instructor these practise projects will help you along the way.
Or you might simply want to drive smoother so that your kids don't get car sick!
Lack of flexibility and smoothness are often noted as problems when experienced drivers are assessed for advanced driver training or tests..
The aim of these exercises is to make all of your gear changes smooth and controlled - your passengers shouldn't notice the fact that you are changing gear at all!
The subjects covered are:
- Taking correct observation before changing gear
- Coordinating the accelerator and clutch while changing gear
- Making selective gear changes
Spend an hour or two playing with the gears, paying particular attention to the points listed in this section– following the guidelines on the following pages.
Keep your sessions short if this helps you to gain success.
Ideally you should choose an out-of-town route. A quiet 'B' class road between 1 and 2 miles long and preferably made up of long straights, would be just about perfect!
1. Smooth changes
 To achieve 'perfect' balance while changing gear you will need to practice several gear changes; this could be fifty or several thousand!
For some drivers the whole concept of smooth gear changing might be alien.
Your aim is to keep the car balanced during the gear change process. No pitching backwards or forwards and no clutch 'drag' on downward gear changes.
You can recognise clutch drag by the sound of the engine - there should be no change in the engine sound as you bring the clutch up (unless the change is made as you press the gas pedal).
In order to eliminate pitching and dragging it's usually easiest to start with 3rd to 4th and 4th to 3rd. If your car has a rev-counter, use it to help match the revs to the speed when making downward gear changes
Accelerator and clutch
 The engine rev's should always match the road speed for the gear selected. That is, there should be no discernible jerk (vehicle weight-shift) as a direct result of a gear change.
If the engine 'drones' you need to either adjust the speed at which the gear change is made or increase the engine revs by light accelerator pressure as the clutch is engaged.
One of the most common problems at this stage is a rushed gear change.
Take your time when making gear changes; if you have any problems slow down your hand and feet movements – make the action slow and deliberate, concentrating on what you can feel through the gas pedal and clutch.
Feel free to make mistakes at this point! But not jerks! Temporary mistakes such as over-revving or slipping the clutch slightly are OK – they will soon pass as you relax and start to get a feel for the new style of driving.
2. Selective gear changing
Earlier in this section you read about the concept of selective gear changing. You now need to practice.
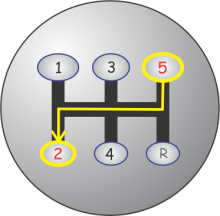 Selective gear changing: Method
Find a quiet stretch of road and practice changing from 4th to 2nd gear. Do this in two ways.1. Practice at about 25mph using the method explained earlier for changing from 4th to 3rd.
2. Practice at around 5mph (or less) after first reducing the speed by use of the brakes.
When you have perfected changing from fourth to 2nd gear try 3rd to 1st, 4th to 1st (on the move at about 2mph) 5th to 3rd, 2nd or 1st and so on (using 6th if you have it).
Driving the getaway car!
Upward selective changes are usually made after accelerating fairly hard in a lower gear, for example after overtaking on a clear open road or when getting away from a bank robbery.
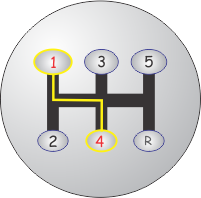 Upward selective changing: Method
Find a quiet stretch of road and accelerate to about 20mph in 1st gear (or to the red-line if you have a rev counter)Change directly from 1st to 3rd or 4th. Keeping the car smooth as you do so.
Practice changing from: 2nd to 4th and 3rd to 5th using a similar 'accelerate and change' method.
Repeat these exercises several times until you are happy with the results.
http://www.smartdriving.co.uk/Driving/CarControl/Gears.htm
No comments:
Post a Comment